DARK SOULS 3 Irithyll of the Boreal Valley Route Guide
Explore DARK SOULS 3 Irithyll of the Boreal Valley with routes to Pontiff Sulyvahn, hidden items, bonfire shortcuts, and tips to protect NPC questlines.
Jump to
How to Reach Irithyll and Cross the Barrier
DARK SOULS 3 Irithyll of the Boreal Valley hides a demanding route behind its snowy streets and moonlit skyline. Reaching Pontiff Sulyvahn means descending through the city, crossing the river, and climbing back toward his cathedral. Follow the landmarks below to open the shortcuts, collect useful equipment, and handle NPC decisions before they close off quest rewards.
You reach the entrance after defeating High Lord Wolnir in the Catacombs of Carthus. Light the Irithyll of the Boreal Valley bonfire before approaching the long bridge.
You need the Small Doll to cross the barrier at the far end. Defeat the Deacons of the Deep in the Cathedral of the Deep to obtain it. If the barrier stops you, return to that cathedral.
- Walk onto the bridge and watch behind you for Sulyvahn’s Beast.
- Dodge sideways around its lunging bites, then attack during recovery. Watch for another bite before committing.
- Defeat it to obtain Pontiff’s Right Eye.
- Cross the barrier and light Central Irithyll.
Keep these connections in mind as you explore:
| Landmark | Route forward | Notable pickup or event |
|---|---|---|
| Central Irithyll | Climb the streets toward the church | Hidden staircase to Dorhys’ Gnawing |
| Church of Yorshka | Descend through the graveyard and cellar | Anri, Proof of a Concord Kept, Undead Bone Shard |
| River and Distant Manor | Enter the sewer to continue toward Pontiff | Great Heal, Excrement-covered Ashes |
| Manor and upper streets | Climb past the Silver Knights | Leo Ring, lift shortcut |
| Pontiff Sulyvahn | Continue through the courtyard and rooftops | Water Reserve, Ring of Favor |
| Rotating staircase | Ride upward to Anor Londo | Optional invisible bridge to Prison Tower |
Help Sirris Before Moving On
If you have progressed Sirris’s quest, return to the entrance bridge after reaching Central Irithyll. Use her summon sign to enter her world and help defeat Creighton the Wanderer.
Return to Firelink Shrine afterward and speak with her for the Blessed Mail Breaker and Silvercat Ring.
To preserve this quest, avoid offering Pale Tongues to increase your rank with Rosaria’s Fingers.
Official page: DARK SOULS™ III (bandainamcoent.com)
Central Irithyll: Streets, Fire Witches, and Hidden Stairs
The uphill road introduces Pontiff Knights, whose curved swords and long combinations punish rushed attacks. Several encounters also place Fire Witches behind weaker enemies, letting them cast while you fight.

Pull enemies toward cleared ground with a ranged attack. Retreat around corners to separate patrols, and finish the smaller enemies before approaching a Fire Witch.
- Climb the stairs from Central Irithyll. Check the small staircase on the right for a Large Titanite Shard.
- Continue toward the fountain, clearing Pontiff Knights individually.
- Fight through the groups accompanying the Fire Witches. Keep moving when a witch plants its weapon and sends flames beneath you.
- Continue uphill until you spot a Crystal Lizard on a small raised balcony to the left.
Avoid chasing the lizard into uncleared enemies. Secure the surrounding street before going after its Twinkling Titanite.
Reveal the Staircase to Dorhys’ Gnawing
On the Crystal Lizard’s balcony, strike the stone railing to reveal a hidden staircase.
Follow the stairs down, collect the Large Titanite Shard, and deal with the Pontiff Knight along the route. Continue down and drop into the enclosed garden occupied by an Evangelist.
Stay close enough to circle around her melee attacks, and use backstabs when she leaves an opening. Defeating her awards Dorhys’ Gnawing, a miracle that inflicts bleed buildup.
Collect the Witchtree Branch near the tree, then open the grated gate. This creates a shortcut back to Central Irithyll.
Collect the Plaza’s Hidden Ring
Return to the uphill road. Draw enemies apart before entering the cathedral plaza.
In the plaza:
- Strike the illusory wall near the shortcut gate to find the Magic Clutch Ring.
- Leave the Ring of the Sun’s First Born for later. You will reach it by dropping from the boss approach above.
Church of Yorshka: Anri, the Graveyard, and Quest Decisions
Take the stairs leading off the main road into the Church of Yorshka and light the bonfire. This becomes your base for exploring the lower city and attempting Pontiff.
Collect the Proof of a Concord Kept near Anri in the church.
Choose Anri’s Quest Branch
If you have advanced Anri’s quest, speak with them near the bonfire and exhaust their dialogue to receive Quiet Resolve. Anri can also give you the Ring of the Evil Eye here if you have not already received it.
A Londor pilgrim hides among the statues in a corner of the church. Your choice determines which branch continues:
- To save Anri from the assassin: Kill the disguised pilgrim. This ends Yuria’s planned marriage route.
- To pursue the Usurpation of Fire ending: Leave the pilgrim alive and continue Yuria’s quest.
Avoid swinging through the church’s statues while undecided.
Search Behind the Large Gravestone
Leave through the descending passage toward the graveyard. Pick up the Roster of Knights on the landing before stepping outside.
Follow the cliffside path toward the large gravestone. Defeat the enemy kneeling there, collect the Homeward Bones, and walk behind the stone to find an Undead Bone Shard. Burn it at Firelink Shrine to improve your Estus healing.
If you helped Sirris defeat Creighton, he can invade here while you are embered. Defeat him for the Dragonslayer’s Axe, then revisit the entrance bridge for the Mirrah Chain Set.
Lower Irithyll: Dark Cellar, River, and Distant Manor
Return from the gravestone and take the descending route toward the lower buildings. Watch for concealed Irithyll Slaves and the dogs gathered along the side path.
 Image: Steam / FromSoftware, Inc.
Collect the Kukri and Rusted Gold Coin before entering the dark cellar.
- Bring a torch to make the interior easier to read.
- Look for glowing eyes and smoky shapes before advancing.
- Clear the ground floor carefully, checking above for enemies waiting on the rafters.
- Climb the ladder and collect the Shriving Stone from the beams.
- Cross toward the raised platform and drop down to the chest containing Yorshka’s Spear.
- Leave the building and descend the outdoor stairs toward the river.
Explore the River Before Taking the Sewer
Sewer Centipedes occupy the water. Pull them apart and attack from the side after their forward rushes.
Search the river for:
- Ring of Sacrifice: To the right when you enter the river.
- Great Heal: In a clearing off the river.
The river leads to two different routes:
The sewer entrance continues toward Pontiff Sulyvahn. It leads through the kitchen, manor, and upper streets.
Distant Manor leads toward Irithyll Dungeon. Light its bonfire for a nearby checkpoint, but return outside to the river if you are following the route to Pontiff.
If you have already entered the dungeon while looking for the city’s boss, warp back to Distant Manor, leave toward the water, and take the sewer.
Protect Greirat’s Irithyll Trip
Before sending Greirat to pillage Irithyll, arrange his rescue:
- Return Siegward’s Catarina armor at the Cleansing Chapel well so his quest can continue to the Irithyll kitchen.
If relying on Siegward, keep him available in Irithyll until Greirat returns. Avoid progressing into Irithyll Dungeon while the rescue is unresolved. Defeat Pontiff Sulyvahn after arranging Siegward’s rescue, then check Firelink Shrine for Greirat’s return.
The Sewer and Manor: Siegward, Silver Knights, and Shortcuts
Enter the sewer from the river and clear the Sewer Centipedes a few at a time. Before climbing the stairs, search the alcove near them for Excrement-covered Ashes.
The stairs lead into the kitchen. If you returned Siegward’s armor and advanced his quest, he will be resting here. Exhaust his dialogue to receive Emit Force, with another opportunity to obtain his Toast and Sleep gestures.
Continue upstairs into the painting hall.
Clear the Silver Knights
A Silver Knight stands on the lower floor while an archer covers the room from above. Pull the ground-floor knight back toward the entrance instead of charging into the hall.
Once it is dead:
- Climb the stairs toward the upper floor.
- Separate the melee Silver Knight from the archer.
- Defeat the archer after clearing its support.
- Open the three chests for the Leo Ring, Smough’s Great Hammer, and a Divine Blessing.
Avoid breaking the nearby urns during combat; they release frost mist.
Open Both Routes Back to the Church
Leave the manor and climb the streets occupied by dogs and spellcasting Irithyll Slaves. Draw the dogs down the stairs before approaching the casters.
At the courtyard, enter the side building and activate the lift. Ride up and open the door to establish a shortcut near the Church of Yorshka.
Return down and continue toward the cathedral. Before entering the next enemy-filled building, take the drop to the left for a Large Titanite Shard and a ladder leading above the room. Use this entrance to reach the spellcasters before clearing the enemies below.
Outside, climb toward the boss entrance and deal with the two Pontiff Knights. Take the stairs leading away from the fog gate and open the gate back toward the church. This creates the shorter route for subsequent attempts.
Before fighting the boss, look down from the upper approach and drop onto the fountain in the main courtyard to collect the Ring of the Sun’s First Born.
Pontiff Sulyvahn: Fight Strategy and Rewards
Pontiff Sulyvahn has 5,106 HP and awards 28,000 souls on a standard first playthrough. His two swords create long attack sequences, and his second phase adds a spectral double.
Open the church shortcut before spending Embers on attempts. While embered, you can summon Black Hand Gotthard near the entrance; Anri and the Londor Pale Shade are available depending on quest progress.
Phase One: Wait for the Full Combination
Dodge around Pontiff’s attacks and keep enough stamina to respond when the combination continues.
- Wait for the sequence to finish before retaliating.
- Take a brief opening, then return to defense.
- Heal after avoiding a committed attack instead of drinking while he approaches.
- Use parries only on attacks whose timing you have learned; some of his sword attacks can be parried.
Heavy weapons can punish recovery, but avoid starting another slow swing just because the previous hit connected.
Phase Two: Read the Double’s Attack
The spectral double usually attacks before Pontiff repeats the motion. Watch it to anticipate the follow-up, and keep both enemies in view.
Attack the clone during a clear opening, especially while it remains close enough for a wide swing to hit both targets. Destroying it creates a temporary stretch without the paired attacks, though Pontiff can summon it again.
Defeating him awards the Soul of Pontiff Sulyvahn and unlocks his bonfire. Continue through the rear exit to reach the route toward Anor Londo.
Beyond Pontiff: Water Reserve and the Rooftops
The courtyard beyond the cathedral contains Giants, hostile Drang fighters, and elevated Deacons. This stretch also attracts Aldrich Faithful invasions during online play.
Travel unembered if you want to reduce interruptions while exploring.
Find the Ring of Favor
Cross the courtyard and enter the building beyond the Giants. Strike the illusory wall on the left to reveal a long ladder descending into the Water Reserve.
Two Sulyvahn’s Beasts occupy the flooded chamber. Attract one with a ranged attack and keep the fight near the ladder end rather than moving into both enemies.
These beasts do not respawn after being defeated. Clear them individually to obtain the Ring of Favor.
Interact with Archdeacon McDonnell in the corner to discover the Aldrich Faithful covenant, and light the Water Reserve bonfire.
Cross the Silver Knight Rooftops
Return up the ladder and climb toward the flying buttresses. Silver Knights fire greatarrows across the narrow approaches.
Use the structures as cover while advancing, then fight on wider landings. Avoid trading blows near exposed edges.
Collect these items along the rooftop route:
- Easterner’s Ashes: Down the stairs to the right after reaching the upper landing.
- Dragonslayer Greatbow and Dragonslayer Greatarrows: On a lower platform reached by dropping from the rooftop route.
- Titanite Scale and Large Titanite Shards: Along the surrounding ledges.
Continue into the round chamber near the rotating staircase. Strike the statue to reveal the Darkmoon Tomb, where you can collect the Brass Set and find the Reversal Ring in a chest beyond the altar.
If you are following Yuria’s marriage route, speak with her after defeating Pontiff, then meet the pilgrim here to receive the Sword of Avowal and perform the ceremony.
Anor Londo and the Hidden Prison Tower
Pull the lever outside the round chamber to bring the rotating staircase down. Climb aboard and operate its upper mechanism to reach Anor Londo, then light the bonfire.
Reach Company Captain Yorshka
With the staircase raised, descend its spiral steps to the lower end. The apparently empty path ahead contains an invisible bridge leading toward the neighboring tower.
Walk across, then turn toward the tower and drop onto its platform. Light the Prison Tower bonfire and speak with Company Captain Yorshka. The Darkmoon Loyalty gesture learned from Sirris allows you to join the Blades of the Darkmoon.
Inside the tower, carefully descend the wooden platforms to collect the Painting Guardian’s Curved Sword and Painting Guardian Set. The descent leads back to a bonfire room in Irithyll.
Open Anor Londo’s Cathedral
Warp back to Anor Londo and climb the broad staircase past the Silver Knights.
- Take the left entrance near the dead Giant Blacksmith.
- Collect the Giant’s Coal from the Giant Blacksmith’s body.
- Enter the dark cathedral and clear the Deacons and slimes.
- Collect the Proof of a Concord Kept near the Deacons.
- Find the mechanism beside the main doors and open them.
- Defeat the Deep Accursed near the entrance to obtain Aldrich’s Ruby.
The opened doors provide direct access from the Anor Londo bonfire. Beyond the remaining Deacons waits Aldrich, Devourer of Gods.
Continue with
 DARK SOULS 3 Map Guide: Area Order and Hidden RoutesExplore the DARK SOULS 3 map with area progression, hidden entrances, bonfire shortcuts, and DLC routes to find your next destination and avoid dead ends.
More in Maps
See all Maps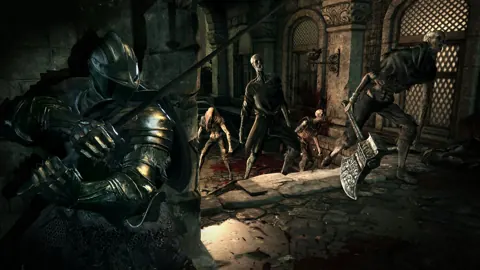
Continue exploring
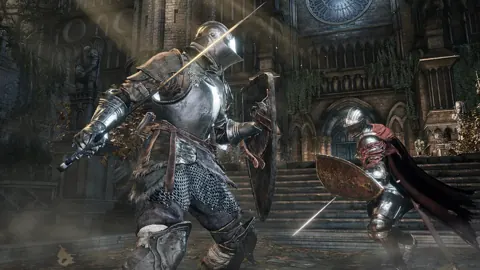
DARK SOULS 3 Aldrich Guide: Weaknesses and Arrow Tips
Beat DARK SOULS 3 Aldrich with tips for both phases, his tracking arrow barrage, useful weapons, spell counters, Anor Londo shortcuts, and boss rewards.
DARK SOULS 3 Covenants: Locations, Rewards, and Ranks
Explore DARK SOULS 3 covenants, find every faction, compare rewards, and learn how to farm covenant items while avoiding Sirris and Mound-Makers lockouts.
Join the community
Official channels for news, updates and player help: