
DARK Souls 3 Gameplay Guide: Combat, Builds, and Bosses
Master DARK SOULS 3 gameplay with tips for stamina, starting classes, weapon upgrades, early bosses, exploration, and co-op. Build a stronger Ashen One.
Jump to

How Dark Souls 3 Plays
One extra swing can turn a winning fight into a trip back to the bonfire. DARK SOULS 3 gameplay combines fast third-person combat, careful resource management, and exploration through ruined castles, poisonous swamps, and hidden passages. Learning when to stop attacking matters just as much as finding a stronger weapon.
You control the Ashen One, a customizable warrior pursuing the Lords of Cinder through Lothric. Weapons, spells, shields, and rings shape how you handle each encounter.
The basic loop is straightforward: explore from a bonfire, defeat enemies for souls, collect equipment, open shortcuts, and challenge the area’s boss. Souls pay for both character levels and purchases. Dying leaves your carried souls behind; dying again before retrieving them loses that previous pile permanently.
Understand Your Three Resources
| Resource | What it does | How to manage it |
|---|---|---|
| Health | Determines how much damage you can survive | Restore it with regular Estus Flasks |
| Stamina | Powers attacks, rolls, and blocking | Stop spending it long enough to recover |
| Focus Points, or FP | Fuel spells and equipment Skills | Restore them with Ashen Estus Flasks |
Unlock nearby doors, ladders, and elevators before resting so your next trip takes a shorter route.
Attack, Dodge, and Recover
Weapons have standard and strong attacks, and some attacks can be charged. Equipment Skills, commonly called weapon arts, provide special abilities that vary by equipment and consume FP.
Practice these habits against the Hollows near the beginning:
- Leave stamina for an escape. Stop your attack sequence before the green bar runs dry.
- Watch the whole enemy combination. A pause between swings does not always mean the attack is finished.
- Try rolling toward sweeping attacks. Practice dodging forward against the Abyss Watchers.
- Lower your shield between attacks. Give stamina time to recover before blocking again.
- Heal during a recovery window. Use an opening after an enemy finishes attacking rather than drinking while it approaches.
Rolls briefly protect you from damage, but equipment weight affects their movement. Keep your equip load below 70% to avoid the slower, shorter heavy roll.
Parrying opens suitable enemies to a riposte. Practice on familiar opponents before relying on this technique during a difficult encounter.
Official page: DARK SOULS™ III (bandainamcoent.com)
Choose Your Equipment Around Your Combat Style
Weapons and spells give you different ways to approach combat. Choose a setup you want to practice, then develop its strengths instead of dividing early levels across every damage attribute.

| Combat style | Equipment | Combat focus |
|---|---|---|
| Sword and shield | Longsword and Silver Eagle Kite Shield | Blocking, melee spacing, and counterattacks |
| Paired weapons | Sellsword Twinblades | Paired weapon attacks and Dexterity investment |
| Pyromancy | Pyromancy Flame, Fireball, and a melee weapon | Combining fire spells with close combat |
Sword and Shield: Practice Melee Fundamentals
Use a shield to study attack patterns, then counter when the enemy finishes its sequence. Pay attention to stamina even when a block prevents health damage.
Keep your equipment within the roll threshold. Carrying heavier armor alongside extra weapons can push your load higher than expected.
Sellsword Twinblades: Learn the Paired Moveset
The Sellsword Twinblades become a paired weapon when you use the two-hand command. Their paired attacks give this setup its identity, so practice those attacks rather than treating them like a single sword.
Build toward a Sharp infusion once you have the required materials and blacksmith access. Sharp improves Dexterity scaling, connecting your weapon damage to that attribute.
Pyromancer: Balance Casting and Melee
Rescuing Cornyx in the Undead Settlement expands your pyromancy choices.
Talk to Cornyx to receive a Pyromancy Flame. Keep a usable melee weapon available so every ordinary enemy does not require another spell cast.
The Claymore is an early option on the High Wall of Lothric. Meet its equipment requirements before committing upgrade materials to it.
Your Opening Route: Cemetery of Ash to Vordt

Cemetery of Ash
- Collect the Ashen Estus Flask beside the fountain. This restores FP and supports spells and weapon arts.
- Practice against the nearby Hollows. Try blocking, rolling, and attacking without exhausting stamina.
- Light the Cemetery of Ash bonfire.
- Collect the Titanite Shard on the stone coffin below the cliffside jump.
- Explore the lower cliff path for five Firebombs.
- Approach Iudex Gundyr and remove the sword to begin the fight.
The Ravenous Crystal Lizard in the side clearing is optional. Leave it for a return visit if fighting it consumes too much healing before Gundyr.
Against Gundyr, wait out a halberd sequence, land a short counterattack, and recover. Gundyr transforms during his second phase. Use the Firebombs during this second phase, and avoid throwing them while an attack is already coming toward you.
Defeating him awards the Coiled Sword and opens the route to Firelink Shrine.
Firelink Shrine
- Plant the Coiled Sword in the central bonfire.
- Talk to the Fire Keeper.
- Visit Andre to inspect weapon upgrades and flask allocation.
- Talk to Hawkwood and Andre until their dialogue repeats. Both have gestures to give you.
- Travel from the bonfire to the High Wall of Lothric.
Allocate your flask uses around what you actually spend. A character relying on ordinary melee attacks needs a different balance from one repeatedly casting Fireball.
High Wall of Lothric
Work toward the Tower on the Wall bonfire, then explore the rooftops and buildings below it. Watch for Hollows that transform into Pus of Man enemies; interrupt the transformation by attacking the Hollow before it finishes.
Prioritize these pickups and shortcuts:
- Estus Shard: In the large indoor room below the rooftops, on an anvil.
- Cell Key: Down the small staircase within that same room.
- Greirat: Locked in a cell at the bottom of the tower beneath the Tower on the Wall bonfire.
- Elevator shortcut: Beyond the courtyard patrolled by the Winged Knight, connecting back toward the opening bonfire.
- Small Lothric Banner: Given by Emma in the cathedral opposite Vordt’s approach.
Accept Greirat’s request after freeing him to receive the Blue Tearstone Ring and bring him to Firelink Shrine.
Vordt of the Boreal Valley
During the first phase, work toward Vordt’s underside or rear instead of trading blows directly in front of his mace. Keep watching his movement; proximity alone does not make you safe.
Keep your counterattacks short enough to preserve stamina for dodging, then reposition toward his rear.
After winning, approach the cliff beyond his arena and raise Emma’s banner to reach the Undead Settlement.
Upgrade Your Character, Weapons, and Estus
Improving your damage involves more than increasing Strength or Dexterity. Weapon reinforcement, infusion choice, and access to additional healing all affect how far you can travel between bonfires.

Spend Levels With a Purpose
These attributes serve different jobs:
- Strength and Dexterity: Meet weapon requirements and improve damage through relevant scaling.
- Attunement: Provides additional spell slots at specific thresholds.
- Intelligence and Faith: Support different magical disciplines and equipment scaling.
Raise Vigor when ordinary mistakes leave you close to death. Shorten your attack sequences when attacking and defending consistently exhaust the same stamina reserve.
Read the scaling letters on your chosen weapon before buying damage levels. A weapon’s attribute bonuses depend on that weapon and its infusion.
Separate Reinforcement From Infusion
Reinforcement increases a weapon’s upgrade level using Titanite. Standard weapons can reach +10.
Infusion changes damage properties or scaling. Important examples include:
- Sharp: Emphasizes Dexterity scaling.
- Fire and Deep: Add elemental damage without attribute scaling.
A Fire-infused weapon will not gain damage simply because you keep raising Strength and Dexterity. Compare your current weapon’s damage when deciding whether to keep that infusion or switch to one that uses your growing attributes.
Bring the Farron Coal to Andre.
Improve Both Flask Capacity and Recovery
Two different collectibles strengthen Estus:
- Estus Shards go to Andre to increase your total flask uses.
- Undead Bone Shards are burned at the Firelink Shrine bonfire to increase flask recovery.
In the Undead Settlement, collect the Estus Shard near the burning tree and the Undead Bone Shard on the small patch of land in the area under the giant’s bombardment.
Make peace with the giant at the top of the elevator tower before exploring the area under his bombardment.
Keep Boss Souls Until You Inspect Their Rewards
Give Ludleth the Transposing Kiln to unlock transposition. Inspect Ludleth’s transposition options before spending boss souls.
Follow the Main Route Without Missing Its Branches
The world connects through distinct areas and optional routes.
| Area or route | Main objective | Important item or reward |
|---|---|---|
| Undead Settlement | Explore the village and reach the elevator tower | Estus upgrades and spell teachers |
| Cathedral of the Deep | Defeat the Deacons of the Deep | Small Doll |
| Farron Keep | Explore the swamp and fight the Abyss Watchers | Passage into the Catacombs of Carthus |
| Catacombs of Carthus | Explore the catacombs | Route toward Irithyll |
| Irithyll → Anor Londo | Explore Irithyll and Anor Londo | Aldrich’s Cinders of a Lord |
| Lothric Castle → Grand Archives | Defeat Dragonslayer Armour and the Twin Princes | Lothric’s Cinders of a Lord |
The Small Doll from the Deacons of the Deep lets you pass the barrier into Irithyll. If you reach that barrier without it, return to the Cathedral branch through Crystal Sage’s arena.
Several optional areas require a closer look:
- Smouldering Lake: Challenge the Old Demon King.
- Consumed King’s Garden: Face Oceiros, the Consumed King.
- Untended Graves: Challenge Champion Gundyr.
Look above and below the obvious path when exploring. Cathedral rafters, elevator openings, and lower ledges lead to equipment and routes that are easy to walk past.
Protect NPC Questlines Before Major Milestones
NPC stories can intersect, conflict, and advance when you move through the world. Talk to characters repeatedly and revisit Firelink Shrine after major discoveries.
Keep these specific decisions in mind:
- Mound-Makers: Examine the cage on the nonhostile Hollow Manservant’s back before defeating the Curse-rotted Greatwood for the early route to Holy Knight Hodrick.
- Yoel and Yuria: Draw out true strength five times, then return to Firelink Shrine to meet Yuria after she replaces Yoel.
- Orbeck: Recruit him with at least 10 Intelligence and bring him sorcery scrolls promptly.
- Irina: Keep dark-miracle tomes for Karla if you want to avoid buying dark miracles from Irina.
Greirat’s pillaging trips deserve particular care. Give Loretta’s Bones to Greirat to advance his questline.
Keep a short note of unresolved requests and locked doors. That makes returning to an unfinished quest easier without forcing you to follow a complete walkthrough.
Use Co-op and Covenants With the Right Setup
Dark Souls 3 supports cooperative multiplayer. Embering increases maximum health by 30%.
For playing with a friend:
- Set the same multiplayer password.
- Agree on the same sign location.
Normal matchmaking considers character level and weapon upgrade level. Password matching relaxes those restrictions for summon signs, so use it when coordinating with a friend at a different level.
Summoned phantoms have fewer flask uses, and bringing allies increases boss health. Use the shared attention to heal or attack safely instead of expecting the boss to fall immediately.
Covenants add different multiplayer roles. Emma gives you the Way of Blue covenant.
Play offline if you want to explore without player invasions. NPC encounters still have their own requirements.
Plan for DLC, Achievements, and New Game Plus
Dark Souls 3 has 43 Steam achievements, and neither expansion is required to earn them. The Master of Rings achievement requires 107 base-game rings, including versions found in NG+ and NG++.
If achievements are your goal, track gestures, spells, covenant rewards, and boss soul choices before starting another journey. Some rewards compete with questlines you may want to complete on a different playthrough.
Approach the Expansions After Building Your Character
Ashes of Ariandel begins through Gael at the Cleansing Chapel. Its entrance appears well before the end of the base game, but the Painted World contains demanding enemies and the Sister Friede encounter.
The Ringed City takes you through the Dreg Heap and into its namesake city, adding encounters such as the Demon Prince, Darkeater Midir, and Slave Knight Gael.
Finish strengthening your main weapon and collecting healing upgrades before committing to these areas. Against Midir, focus on the head and learn the openings after his attack sequences. Against Gael, watch the reach of his later sword attacks before assuming a backward roll has created enough distance.
Finish Your Current Journey Before Starting Another
After the ending, you can continue exploring instead of immediately beginning NG+. Use that opportunity to visit optional areas, spend boss souls, collect remaining equipment, and prepare for covenant farming.
Covenant offering items can also be farmed from enemies offline.
Equip item discovery gear when hunting those drops. The Covetous Gold Serpent Ring and Crystal Sage’s Rapier increase discovery, while the Symbol of Avarice provides another increase at the cost of continuously draining health.
Before selecting the next journey, inspect Ludleth’s transposition options one more time.
Continue with
 DARK Souls 3 How Long To Beat: Story, DLCs, and 100%DARK SOULS 3 how long to beat depends on your goals. Compare main story, optional bosses, both DLCs, and all-achievement times to plan your playthrough.
More in Guide
See all Guide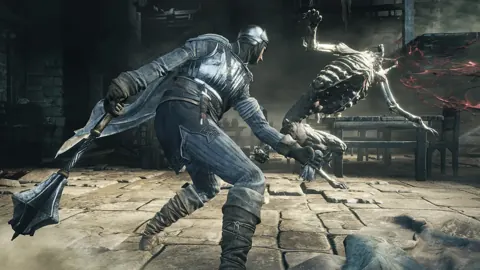
Continue exploring
Join the community
Official channels for news, updates and player help: