
DARK SOULS 3 Beginner Guide: Survive Your First Hours
Use this DARK SOULS 3 beginner guide to choose a class, level smarter, upgrade weapons, manage Estus, and learn combat before taking on Lothric's bosses.
Start With a Character You Can Learn With
One extra swing can turn a winning fight into a trip back to the bonfire. This DARK SOULS 3 beginner guide explains how to stay alive, spend your souls, and build a character that gives you room to learn. Start with manageable equipment and a few clear priorities, and those intimidating encounters become much easier to read.
1. Practice with your starting equipment
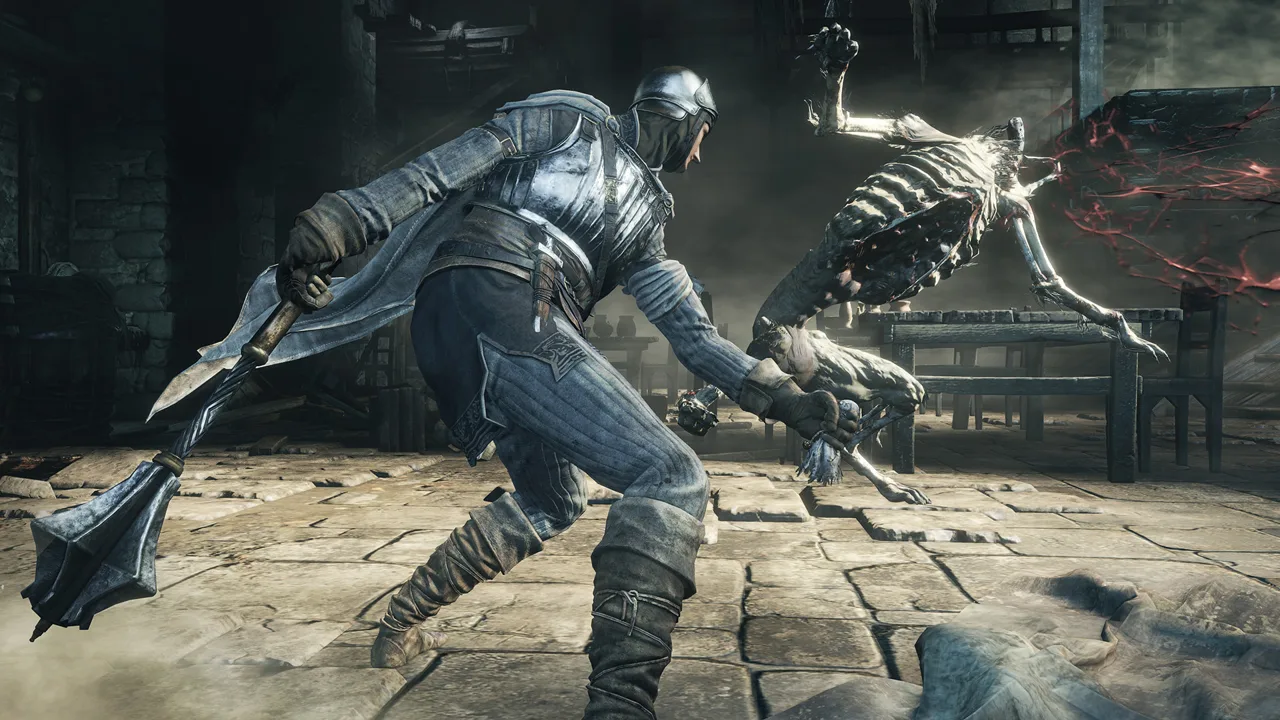
Practice blocking, rolling, and attacking as you learn each enemy’s movements.
You can develop the character in another direction as you gain levels, so choose equipment you want to use now.
2. Give your early levels a purpose
Meet your weapon’s requirements, then invest in survival. More health gives you another chance to recognize an attack; more stamina gives you room to attack and still escape.
| Attribute | Main benefit | Early leveling priority |
|---|---|---|
| Vigor | Increases maximum health | Raise it when mistakes are ending fights too quickly |
| Endurance | Increases stamina | Invest when attacking and defending exhaust your bar |
| Vitality | Increases maximum equip load | Raise it when your chosen equipment makes you too heavy |
| Strength | Meets weapon requirements and supports relevant scaling | Follow your weapon’s requirements and attribute bonuses |
| Dexterity | Meets weapon requirements and supports relevant scaling | Follow your weapon’s requirements and attribute bonuses |
| Attunement | Increases spell slots | Invest when developing a spellcasting build |
| Intelligence | Supports sorceries and relevant weapon scaling | Prioritize it for an Intelligence build |
| Faith | Supports miracles and relevant weapon scaling | Prioritize it for a Faith build |
Keep improving your weapon alongside your character rather than expecting levels alone to solve low damage.
Avoid spreading points across every offensive attribute. Pick a direction and let your equipment guide further investment.
Official page: DARK SOULS™ III (bandainamcoent.com)
Learn the Combat Rhythm Before Chasing Damage
 Image: Steam / FromSoftware, Inc.
3. Watch the end of an enemy’s combo
A raised weapon tells you an attack is coming. The recovery after the attack tells you when you can safely respond.
Against an unfamiliar enemy:
- Approach without immediately attacking.
- Watch its reach and follow-up swings.
- Dodge or block the sequence.
- Answer with a short attack.
- Leave enough stamina to defend again.
Start with brief punishments. Extend your attacks only after you recognize which openings allow it.
Lothric Knights make this lesson clear: reacting to the opening swing and attacking immediately can leave you exposed to the rest of the combo.
4. Keep your equip load below 70%
Equip load at 70% or greater causes a slow roll. Check the percentage whenever you change armor, weapons, shields, or rings.
Switch to lighter equipment when you need to lower the total.
Practice roll timing as well as direction. Against sweeping attacks, practice rolling through the incoming strike. Repeatedly rolling backward can leave you within reach of the next swing.
5. Treat stamina as your escape reserve
Attacking and blocking both consume stamina. Spending the entire bar on offense leaves you vulnerable when the enemy survives.
Watch how much stamina your weapon consumes. With a heavier weapon, one committed attack can demand more caution than several quick sword swings.
Blocking also costs stamina. If an incoming attack empties the bar while your shield is raised, your guard can break.
6. Use shields and critical attacks deliberately
Check a shield’s physical absorption before relying on it. Look for 100% physical damage absorption when choosing a shield for blocking physical attacks.
Stability affects the stamina cost of blocking. Even a shield that stops physical damage can leave you vulnerable if you try to absorb an entire heavy combo.
Backstabs and ripostes reward positioning and timing:
- Move behind a suitable enemy for a backstab opportunity.
- Parry an eligible attack to create a riposte opening.
- Break a guarding enemy’s defense to expose it to a critical attack.
Parrying is optional. Learn ordinary dodges and attack openings before making a demanding counter your main defense.
7. Spend an opening on healing when necessary
Drinking Estus takes time. Create the same breathing room you would need for an attack: evade a committed move, then heal during the enemy’s recovery.
If a boss repeatedly hits you while you drink, change the timing. Simply retreating a short distance does not guarantee safety against a lunging attack.
Make Firelink Shrine Your Upgrade Stop
 Image: Steam / FromSoftware, Inc.
8. Learn what each resident does
Use the bonfire’s travel menu to reach the High Wall of Lothric.
Before leaving, meet the residents you will return to throughout the game:
- Blacksmith Andre: Reinforce weapons, apply available infusions, and manage Estus.
- Shrine Handmaid: Buy supplies and key items; give her ashes to expand her inventory.
- Ludleth of Courland: Exchange boss souls for special items.
Talk until dialogue repeats. Some conversations award gestures or advance a character’s story.
9. Upgrade both the quantity and strength of Estus
Two collectibles improve your flasks in different ways:
| Item | Where to use it | Effect |
|---|---|---|
| Estus Shard | Blacksmith Andre | Increases the total number of flask uses |
| Undead Bone Shard | Firelink Shrine bonfire | Increases how much your flasks restore |
Andre also reallocates uses between regular Estus and Ashen Estus.
For a melee character that rarely uses FP, assign more uses to health recovery. For a caster, keep enough Ashen Estus to support the spells you actually use.
10. Reinforce a weapon you enjoy
Visit Andre when you find Titanite. Reinforcement improves your weapon, and neglecting it can make ordinary enemies feel far tougher than they should.
Practice a weapon’s light attacks, heavy attacks, reach, and recovery before committing scarce materials. Many heavy attacks can be charged, giving you another option for longer openings.
Buy useful supplies without emptying your purse on expensive optional purchases. The 20,000-soul Tower Key opens valuable exploration around Firelink, but you can purchase it later.
Follow the Opening Route Without Fighting Everything
 Image: Steam / FromSoftware, Inc.
11. Get past Gundyr before tackling optional challenges
Collect the Ashen Estus Flask near the fountain in the Cemetery of Ash. Practice on the nearby Hollows and rest at the bonfire before entering Gundyr’s arena.
During the fight, focus on his attack recovery and keep your responses short. Use Firebombs during his second phase.
The Ravenous Crystal Lizard on the side path is optional. Return when you are more comfortable if it is consuming your healing.
The Sword Master outside Firelink Shrine is another optional challenge. He drops the Uchigatana, but you can continue to the High Wall without defeating him.
12. Search the High Wall for practical upgrades
The High Wall contains several items that directly improve your opening hours.
| Find | Location | What it gives you |
|---|---|---|
| Longbow | Side route to the right from the High Wall of Lothric bonfire | A ranged option for drawing enemies out |
| Estus Shard | Anvil in the large indoor room reached after the rooftops | Another flask use after visiting Andre |
| Cell Key | Down a short staircase in the same large room | Access to Greirat’s cell |
| Silver Eagle Kite Shield | Chest along the upper route overlooking that room | Another shield to examine |
| Claymore | Walkway exposed to the wyvern’s fire | Another weapon to try |
| Deep Battle Axe | Mimic beneath the wyvern | A weapon already infused with dark damage |
Approach the crowded indoor room carefully. Draw enemies toward you instead of dropping into the middle of the group.
Use the Cell Key to free Greirat, whose cell is on the lowest level beneath the Tower on the Wall bonfire. Accept his request to bring him to Firelink.
13. Open the shortcut before fighting Vordt
Beyond the Winged Knight courtyard, explore the route leading to an elevator. Opening this shortcut reconnects the area to the High Wall of Lothric bonfire and shortens later trips.
Speak to Emma in the cathedral to receive the Small Lothric Banner. Continue talking to receive the Way of Blue covenant item.
Against Vordt, watch for the end of an attack sequence before committing to your own swings. Avoid chasing him through an unfinished sequence.
After winning, approach the cliff beyond his arena and raise the banner to reach the Undead Settlement.
14. Explore the Settlement’s branches
The Undead Settlement introduces merchants, spell teachers, and useful healing upgrades. Look for:
- Yoel: Among the pilgrims near the area’s entrance.
- Cornyx: Rescue him from his cage to bring a pyromancy teacher to Firelink Shrine.
- Irina: Behind a locked route accessible through the sewers with the Grave Key.
- Siegward: Speak to him repeatedly when you meet him.
- Estus Shard: Near the firepit surrounded by worshipers.
- Undead Bone Shard: On a separate patch of land in the giant’s firing area.
Read keys before buying or using them. Giving the Mortician’s Ashes to the Shrine Handmaid unlocks the Grave Key for the route to Irina.
Beyond the Settlement, the Road of Sacrifices eventually branches toward the Cathedral of the Deep and Farron Keep. Explore both. Defeating the Deacons of the Deep awards the Small Doll.
Match Your Weapons and Magic to Your Stats
15. Choose a moveset before choosing a damage number
Straight swords provide quick, versatile attacks. Greatswords offer heavier swings with more commitment, while spears let you attack from farther away.
Try new equipment near a bonfire and compare how it handles:
- Does its reach let you punish safely?
- Can you recover before the enemy retaliates?
- Does it work in narrow passages?
- Can you afford its stamina cost?
For paired weapons such as the Sellsword Twinblades, the two-hand command draws the second weapon and enables paired attacks. Equipping unrelated weapons in each hand does not create that paired moveset.
Keep a bow or throwing knives available to separate enemies from a group. Drawing one opponent into a cleared area reduces the number of attacks you must track.
16. Understand reinforcement, scaling, and infusion
Reinforcement raises a weapon’s upgrade level. Scaling adds damage based on relevant attributes. Infusion changes a weapon’s properties and can alter its scaling.
Read the attribute bonuses on your weapon. Use those bonuses alongside the weapon’s requirements when deciding where to invest.
Raw, Fire, and Deep infusions remove attribute scaling in exchange for their respective damage arrangements. That lets an early character meet minimum requirements and spend more levels on survival.
Heavy and Sharp infusions support Strength and Dexterity investment respectively.
Read the actual changes before confirming an infusion.
17. Set up spells before leaving the bonfire
To cast a spell, you need to attune it, meet its requirements, and equip an appropriate catalyst.
| Spell type | Casting equipment | Attributes to examine |
|---|---|---|
| Sorceries | Staff | Intelligence |
| Pyromancies | Pyromancy Flame | Read the individual spell’s requirements |
| Miracles | Talisman or chime | Faith |
Attunement governs available spell slots, and some spells occupy multiple slots. Spells consume FP.
Give Orbeck of Vinheim sorcery scrolls after recruiting him in the Road of Sacrifices.
Explore Carefully and Keep NPC Options Open
18. Inspect rooms, chests, and messages
Before collecting a conspicuous item, check doorways, ceilings, corners, and ledges above you. Enemies frequently wait outside your immediate view.
Examine wooden chests before opening them. Mimics visibly breathe, and their chain lies differently from a normal chest’s chain. Strike a suspicious chest once and give yourself space to react.
Player messages can identify secrets or lead you into traps. Appraisals do not make a cliff safe. Use your view of the landing and the surrounding environment before committing to a drop.
Avoid testing an uncertain descent while carrying souls you want to keep.
19. Carry a torch beyond the dark rooms
The Shrine Handmaid sells a torch early. It helps you see ambushes, and later it has a particularly useful role against maggot infestations.
Around the Cathedral of the Deep, certain enemies cover you in maggots that keep building blood loss. Hold a torch to remove the infestation.
Fire attacks also help against several enemies in that area. Keep the torch available even if you normally explore with a shield.
20. Revisit NPCs after major progress
Return to Firelink after bosses and new areas. Residents move, gain dialogue, and offer new services as their stories advance.
Keep these choices in mind:
- Read Yoel’s “Draw Out True Strength” option as a quest decision: its free levels grant Dark Sigils and introduce Hollowing.
If a particular NPC’s story matters to you, follow that quest deliberately. Completing every encounter is a separate undertaking from learning how to survive.
Protect Your Souls and Preserve Special Rewards
21. Make retrieval trips with a clear objective
On a retrieval attempt, take the route you already understand. Ignore optional enemies and tempting side paths until you recover the bloodstain.
Spend souls before unfamiliar exploration when you can buy a useful level, reinforcement, or supply.
Open shortcuts before resting whenever you can reach them safely.
22. Save boss souls until you see their exchanges
Boss souls can become unique equipment or spells through Soul Transposition.
Examine the available rewards before consuming a boss soul for currency.
Each exchange consumes the soul. If the same soul offers two rewards you want, obtaining both normally means earning another copy in a later playthrough.
If you eventually pursue achievements, keep these distinctions in mind:
- 43 achievements belong to the base game.
- Master of Infusion requires performing all 15 infusion types.
- The DLCs are not required for the base game’s achievements.
Use Co-op When You Want Another Sword Beside You
23. Understand Embers before summoning
Becoming Embered increases your maximum health by 30% and allows you to summon assistance where summoning is available. It also exposes you to invasions.
To host ordinary co-op, become Embered and look for summon signs in an eligible area. NPC summon signs depend on the relevant characters and quest conditions.
Summoned allies increase a boss’s health, but splitting its attention can give you room to heal or attack. Summon help whenever you want to share the encounter.
24. Help another player to practice a boss
Buy the White Sign Soapstone from the Shrine Handmaid to place your own summon sign.
Helping another host defeat a boss earns an Ember and lets you practice the encounter.
Ordinary matchmaking considers both character level and weapon upgrade level. When playing with a friend, use matching password settings to connect across larger progression differences.
For solo exploration without player invasions, select offline play.
Continue exploring

DARK SOULS 3 Best Strength Weapons: 11 Powerful Picks
Find the DARK SOULS 3 best strength weapons, compare stat requirements and infusions, and choose powerful swords, axes, and hammers for your next build.

DARK SOULS 3 Builds: Stats, Weapons, and Class Guide
Explore DARK SOULS 3 builds for Strength, Dexterity, sorcery, and pyromancy. Choose your weapons, plan your stats, and match rings to your own playstyle.
Join the community
Official channels for news, updates and player help: